Showing posts with label Fall 2010. Show all posts

Friday, November 19, 2010

InflataTent

After making my InflataTent in Rhino, I used the unroll command to make pattern pieces. I selected the unrolled pieces and exported them into Illustrator. In Illustrator I made seam allowances for each patter piece by copying each path (individually) and shifting it over about 1/4". I then saved them as a PDF and printed them on the plotter. I taped the pattern pieces on a table w plastic sheeting on top and traced the patterns. I learned how to do this thru sewing, but cutting fabric is a lot easier than cutting plastic sheeting. When cutting fabric I pin each pattern piece to the fabric so it is the exact same size as the pattern piece. I could not pin the pattern piece to the plastic because it would rip and I would be left with holes that might inhibit the tent from inflating. I tried to tape the plastic sheeting as taut as possible, but the bigger the pattern piece the harder it was to stretch it out flat. As a result the pattern piecesweren't perfect and they did not fit together perfectly.

After tracing and cutting each piece I constructed the tubes. I used packing tape to seal the seams. First I put tape down one long side on the back then I rolled it over a piece of 2x4 with the adhesive of the tape facing up on top of the 2x4. I took the other side of the plastic and made sure the middle and corners lined up. I tried to make the seams as flat as possible by pulling the plastic taut while taping it. After getting the inside tape done I went over the seam again with tape for reinforcement. This also helps to make the tubes air tight. I ended up with 7 sets of tubes each with 4-8 pieces.
Although I did not finish the construction of the inflatable, I learned a lot from the process. The first thing I learned is that I should have made it out of vinyl or pvc coated fabric so I could sew it. Sewing is a lot easier than working with tape and plastic. It is also more professional since that is how the inflatables for moon bounces are constructed. I also learned more about working with Rhino. In the past I have had a lot of issues using the BolleanUnion command. This time I figured out why I was having problems with it. After making my tent about 3 times I realized that some of the parts were at too extreme of an angle and not intersecting the other part in the right place. I adjusted them and got every piece to Bolean correctly. This allowed me to have the exact pattern pieces to have a completely hollow frame to be inflated. I also learned how to export the pieces into Illustrator, something I never knew I could do before. Being able to work with Rhino and Illustrator for this project helped a great deal in making the pattern pieces. As much as I don't like working with computers that much, I can see how helpful it can be with certain sculptural processes.

I will be completing the inflatable over the break, hopefully I will be able to figure out how to get each tube to fit correctly. I also really want to do this with fabric and sew it so I might try to find the fabric somewhere in America, since I had been looking before and could only find a supplier in Europe.

Wednesday, November 17, 2010

john mcmahon: teef(3D scanning)

i never messed with a 3D scanner before
so that was something i definitely wanted to test out
for my first scan i wanted to keep it simple
was searching for an object to scan and came across
my friend sam's car sculpture that was laying around
scanned the car but at a super high resolution
which didn't leave much room on the computer to complete the steps for outputting
after referring with prof. scott, he told me to step the res. down
so i scanned my teeth(a plaster model of my teeth)
the goal was to scan the uppers and lowers and alter them
and output to the wax printer in the jewerly building
but once i over came the scanning process
i ran into some issues with offsetting the surfaces to create digital "fronts"
the offset that the wax printer needed to meet the minimum output
was to much for rapidworks and rhino to do a simple offset
the larger offset was producing self intersecting surfaces
a no no in rapid prototyping
need more time to troubleshoot through this issue


madebymixta

john mcmahon: Corrugation - Plica cont.

got caught up in the rush so there is a lil gap in the pics
painting, cement casting and acrylic bending was not recorded
but i have the jig i used for bending the extruded acrylic rods
and then i jump right to the presentation pics, fdm 1/4 scale model,
and model in context(museum)


john mcmahon: tip top cont.

so this model didn't make it to the final presentation
due to some technical difficulties, i have to remember when some part of the process is new to me i have to leave extra time for troubleshooting
to continue the model journey
after sanding i made some extra parts out of urethane foam to act as a draft angle
and it follows one of my guidelines
if it doesn't have to look pretty make it look as ugly as possible
to the big vacuum former to pull 1/8" styrene 26" x 26"
i only wanted the top surface, all the extra is for the cause
trimmed the styrene and left a whole in the center to add strips of styrene
these strips were going to be a playful, over lapping and weaving to create a lighting piece
getting the strips to act the way i wanted is where i had trouble
using straight styrene strips had to much tension in them and would not hold the shape i was after
the glued bond kept on failing
so i went to heat forming but once the heat was introduced
the strips had to still relax and to keep them in position while they heated up was more difficult then i realized
the size of the styrene strips were 12"long by 1/8" by 1/8"
oh i love process pics


madebymixta

Tamela Sicay-Perrow: Final Robot Post


These pictures mark the culmination of my 3 pepakura project to date. The theme is a robot which is dissasembled on purpose. The continuation of this project is to use wires and lights to either suspend it in a workshop type atmosphere or to distress further and add attachments to make it look like a real robot being repaired. The pictures follow first from the modeling, to breaking it up in pepakura, to illustrator workflow and to the progress from unpainted pieces to a mostly assembled final silvery robot. There is more yet to come in this avenue of projects.

Tam

Brandy Koch: Final Blog post....for now!


So I want to start off by saying this has been such an amazing experience! Mr. Scott you rock and we all love to work hard for you! With that being said Im going to post the last few pictures I have and explain my work a little better. electricparK. is the name of my company, and also my band. Everything I do has to do with these basic principles. Music and art are the same. Man & woman. Equal parts. Ryan & Brandy. When I design my functional accessories, Im designing for my perfect, bad-ass, alter ego that I turn into when I perform. Now we know people are not perfect, of unbreakable or even adventurous. I try to design for the girl that doesn't care what people think or say. I try to be more like that in all I do. Making funky outfits is fine, but wearing them is totally different. I try to walk that fine line between something you would wear everyday, & lets say...Lady Gaga. I dont like extremely loud or outrageous stuff either. But different, unique, one-of-a-kind. Thats the realm Im going for! With all that being said...weapons.... I use weapons as a subject that people dont want to talk about, its sensitive, its dangerous, its obvious. But put those weapons into a womens world and it becomes foreign. Im a feminist to say the least, and I plan on giving all women the power that I feel and have in hopes that oneday in our country we may actually see equal rights for all peoples...

john mcmahon: tip top

tip top is over head lighting piece made out of corian
due to the size this is a 1/4 scale model in styrene
once designed i modeled a base or pattern model which i use to create the prototype
modeled the base in solid works and then imported into rhino where i section the model
and prepped the file to be sent to the laser cutter lab techs
laser cut out of chipboard and glued and assembled
a little bit of sanding, some bondo, and priming
and a final dry sand at 320


madebymixta

Wednesday, November 10, 2010

Brandy Koch: Key Shots

This program for some reason was the hardest for me to use! These are just a few examples!


Tuesday, November 9, 2010

john mcmahon: Corrugation - Plica

right here are the steps that i took in creating my museum seating
Plica
first modeled in solidworks
then imported into rhino
to be handed over to kemal
for cnc milling
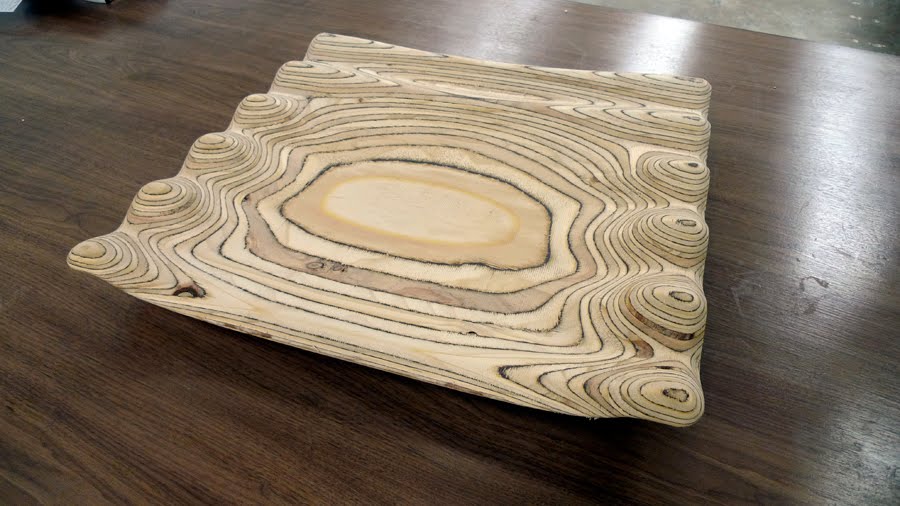
material selection is stacked plywood, to the keep cost down
but where i saved on material i spent more time on finishing
next time i would spend more money on some renshape
after the milling is the finish sanding, priming, and painting


madebymixta